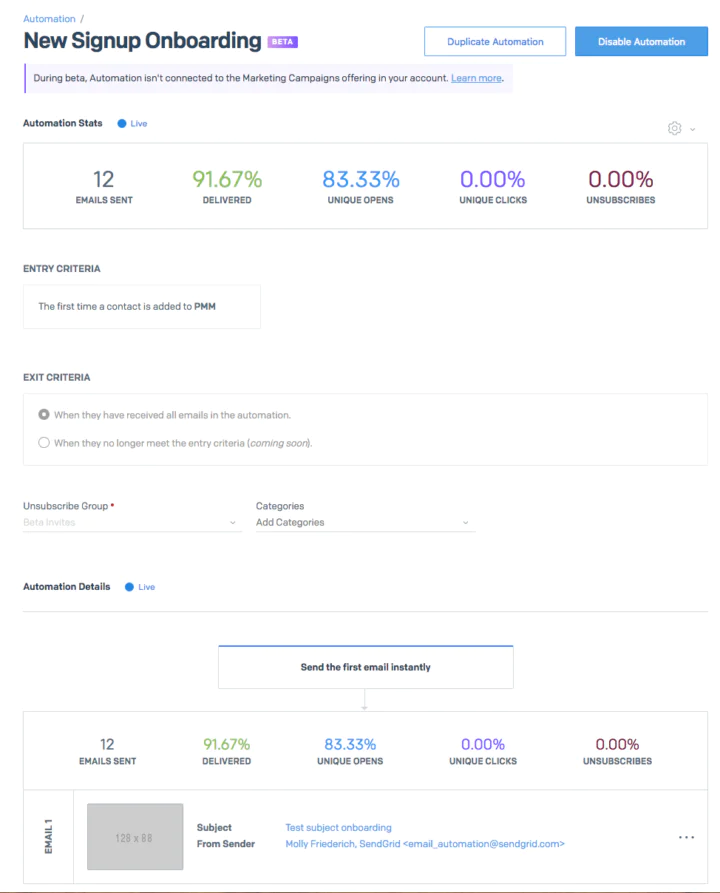
Step 1: Name your automation
App Signup Welcome Flow
Step 2: Define your entry criteria
Set your entry criteria to “The first time a contact” “Is added to a list” and create a new list called “New App Signups”.
Step 3: Define your exit criteria
For now, leave this step as is: recipients who enter the automation will receive all emails in your series. You’ll want recipients to receive each welcoming email in the series!
Step 4: Assign your Unsubscribe Group and assign categories
Create a new Unsubscribe Group for “App Signup Welcome Flow” so your recipients can choose to opt-out of this particular automation.
Add a category for “App Signup Welcome Flow” and any other categories that will help you track the performance of this automation.
Step 5: Build the email experience for your contacts
Craft three messages (Tip: we recommend no more than three emails in a welcome series):
- A simple, on-brand, signup confirmation with a warm thank you.
- An overview of the value of your fitness app, including a motivating user testimonial.
- Tips for how to get started by adding their fitness baseline and goals.
- Looking for some examples of some winning welcome emails? Check out 4 Effective Welcome Email Campaigns.
Decide when to send each message in your series:
- Welcome: Send immediately
- Overview: Send 1 day later
- Tips: Send 3 days after your overview message
Step 6: Trigger your automation
Towards the end of each day, export a list of new users from your database.
The next morning, add your batch of new users to your “New App Signups” Automation list.
Business Goal: Drive attendance to an upcoming live yoga event in Chicago
Send to: Chicago contacts who love yoga
Message ideas:
- Announcement
- Agenda highlight
- Promotion (discount code etc.)