
Send With Confidence
Partner with the email service trusted by developers and marketers for time-savings, scalability, and delivery expertise.

Time to read: 13 minutes
Email is as important a communication tool as ever. To help you better leverage email, I’m going to show you how to send email using PHP’s Mezzio framework and Twilio SendGrid’s API.
Specifically, you’re going to learn how to send emails with both plaintext and HTML bodies, and that includes a PDF attachment. You’re also going to learn how to use Twilio SendGrid’s transactional templates functionality to make creating email bodies simpler both by the development team as well as any other team within your organization.
Sounds good? Let’s begin.
As a way of making this tutorial more meaningful, pretend that the code that we’ll write is part of a fictitious, online ecommerce shop built with Mezzio, named The Little PHP Shop—specifically, the part immediately after a customer makes a purchase. At that point in the user flow, the customer receives an email, thanking them for their purchase, and includes a PDF invoice for their records.
We’re going to create a Handler class to send the post-purchase email, which will receive purchase details from an order completed by the customer. With that purchase information, the Handler class will then use several classes in the SendGrid PHP API to build and send the purchase confirmation email.
Of these, the most important are “SendGrid\Mail\Mail” and “\SendGrid.” “SendGrid\Mail\Mail” is the object that stores all of the properties for an email message that we’ll send through Twilio SendGrid. The “SendGrid” object forms the transport layer, facilitating the sending of emails through Twilio SendGrid.
To complete this tutorial, you'll need the following 4 things in your local development environment:
We first need to create the base application. To do that, we’re going to, as always, use the Mezzio Skeleton to do it for us. Once we scaffold the base application, we’ll switch to the newly created project directory. Then run the following commands in your terminal, following the prompts for the first one:
| bash | |
| composer create-project \ | |
| mezzio/mezzio-skeleton \ | |
| twilio-sendgrid-ecommerce | |
| cd twilio-sendgrid-ecommerce |
When we invoke the class, it has access to the application’s dependency injection (DI) container, from which it’ll retrieve the configuration details that we stored in “config/autoload/mail.global.php.”
After that, it’ll instantiate a new “SendGrid\Mail\Mail” object and set the from and reply to details by passing the respective configuration details to calls to “Mail,” “setFrom,” and “setReplyTo” methods, respectively. After that, it’ll return the instantiated “Mail” object.
To use it, though, you have to register it with the DI container. To do that, in “src/App/src/ConfigProvider,” add the following entry to the “factories” element in the array returned from the “getDependencies” method.
Running the command above does four things for us:
With “EmailSenderHandler.php” created, we now need to refactor it so that it can send emails. To do that, we’ll first refactor “EmailSenderHandler’s” constructor, replacing the “TemplateRendererInterface” parameter with 3 new parameters. These will initialize 3 new class member variables:
You can see the revised constructor in the example below, along with the related class member variables. Replace the existing class member variable and the constructor with this code.
This retrieves a “\SendGrid\Mail\Mail” object from the DI container, preinitialized with the sender and reply to email details, and initializes a new object named “$message.” It then instantiates a new “SendGrid” object, named “$mailer” for sending the mail message. Finally, it retrieves the mail configuration from the application’s configuration. Then, it uses these to initialize and return the “EmailSenderHandler” object.
With all of those changes, there’s one last change to make before we can test the code and send an email. We have to update the routing table so that the default route uses our new Handler class as the route’s handler, instead of “HomePageHandler.” To do that, replace the default route’s definition in “config/routes.php” with the following example.


Partner with the email service trusted by developers and marketers for time-savings, scalability, and delivery expertise.
| bash | |
| composer require \ | |
| sendgrid/sendgrid \ | |
| sendgrid/php-http-client \ | |
| vlucas/phpdotenv |
| php | |
| $dotenv = Dotenv\Dotenv::createImmutable(__DIR__ . '/../'); | |
| $dotenv->load(); |
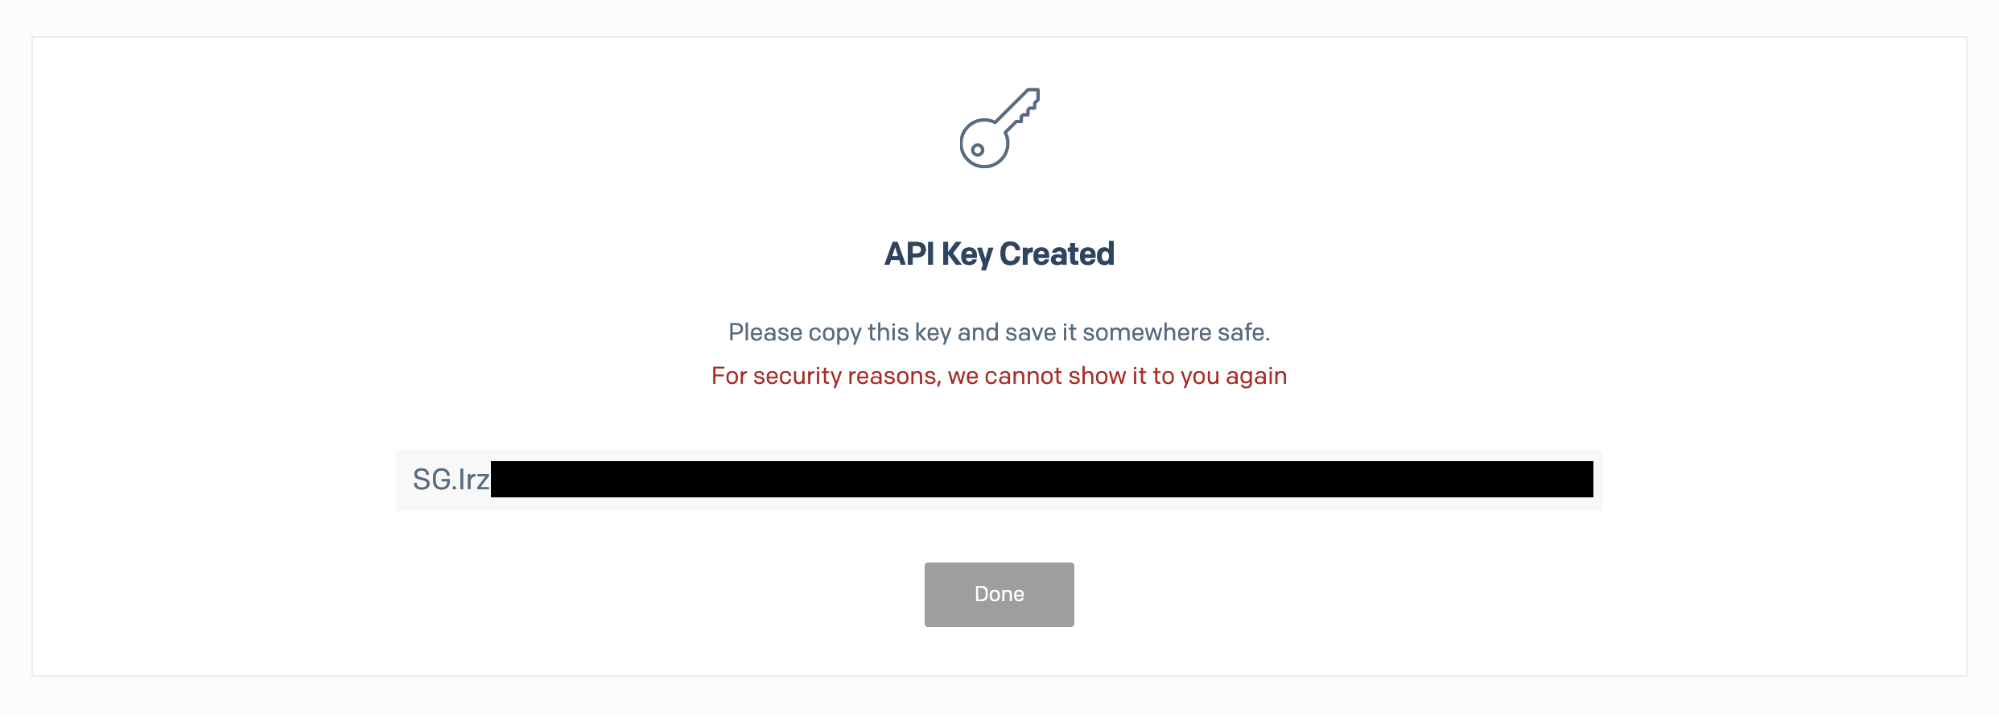
| ini | |
| SENDGRID_API_KEY='<your SendGrid API key>' | |
| SENDGRID_DEFAULT_SENDER_ADDRESS='' | |
| SENDGRID_DEFAULT_SENDER_NAME="" |
| php | |
| <?php | |
| $plainBody = <<<EOF | |
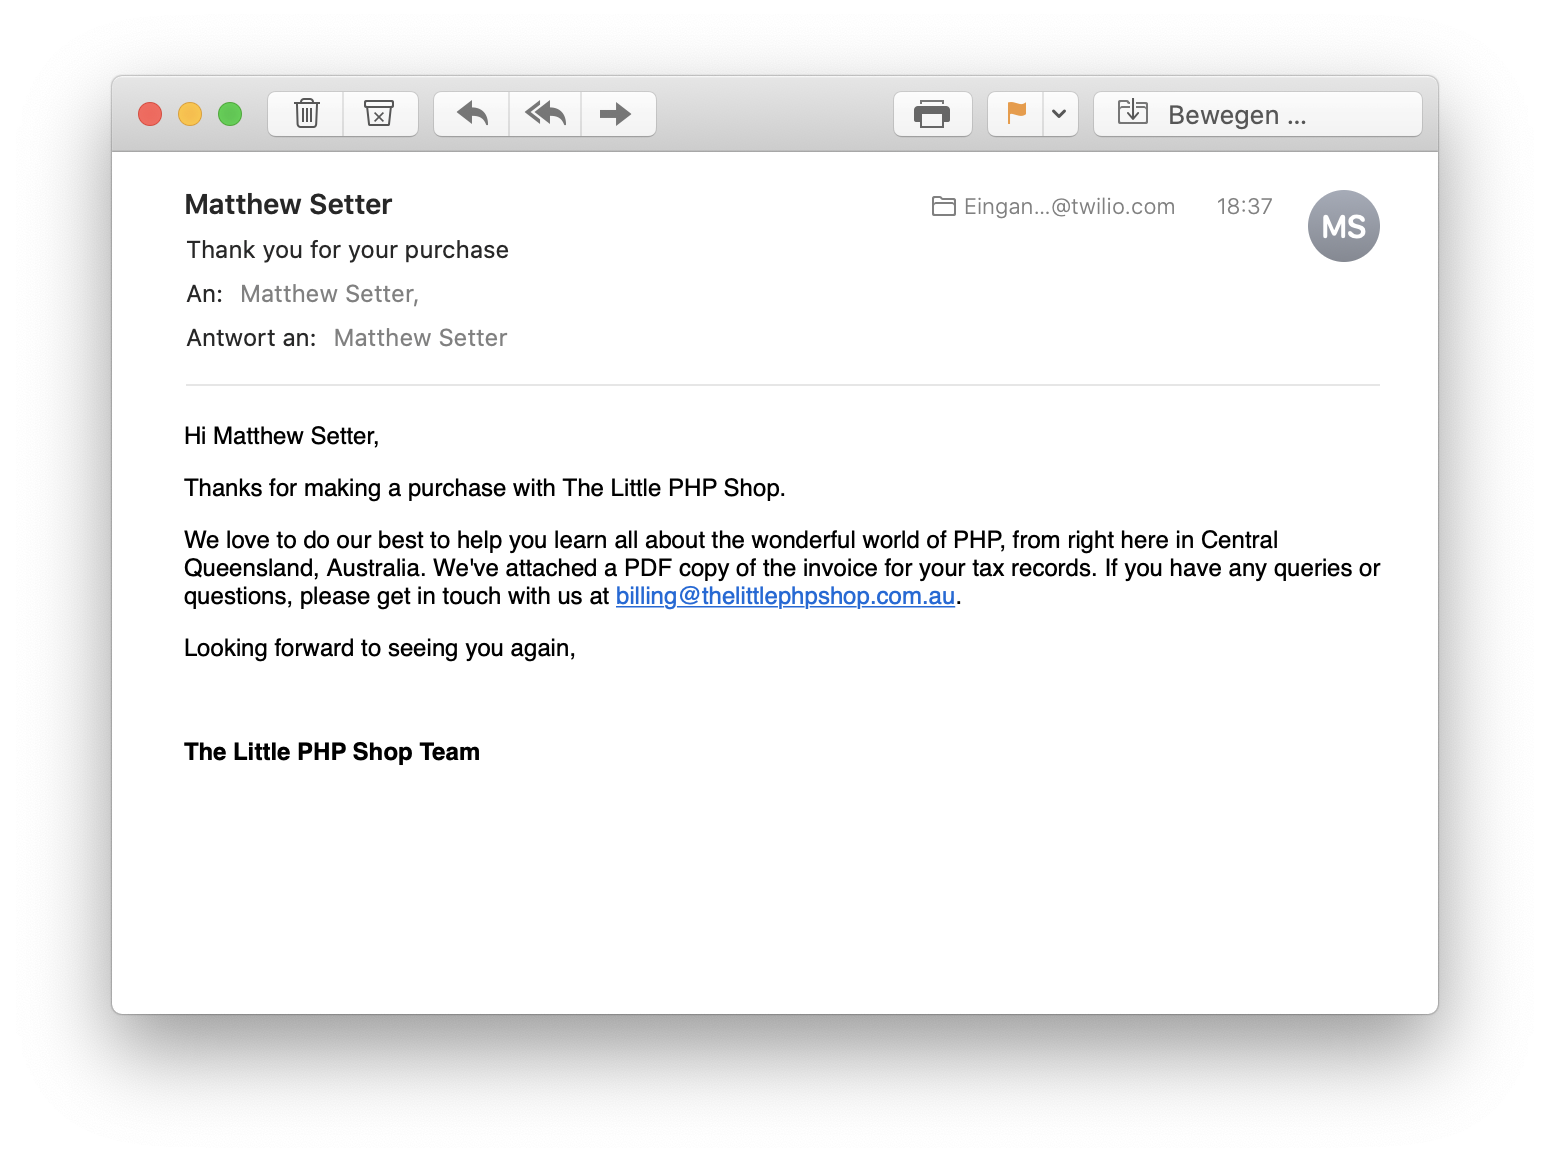
| Hi -first_name- -last_name-, | |
| Thanks for making a purchase with The Little PHP Shop. | |
| We love to do our best to help you learn all about the wonderful world of PHP, from right here in Central Queensland, Australia. We've attached a PDF copy of the invoice for your tax records. If you have any queries or questions, please get in touch with us at billing@thelittlephpshop.com.au. | |
| Looking forward to seeing you again, | |
| The Little PHP Shop Team | |
| EOF; | |
| $htmlBody = <<<EOF | |
| <p>Hi first_name last_name,</p> | |
| <p>Thanks for making a purchase with The Little PHP Shop.</p> | |
| <p>We love to do our best to help you learn all about the wonderful world of PHP, from right here in Central Queensland, Australia. We've attached a PDF copy of the invoice for your tax records. If you have any queries or questions, please get in touch with us at billing@thelittlephpshop.com.au.</p> | |
| <p>Looking forward to seeing you again,</p> | |
| <br> | |
| <p><strong>The Little PHP Shop Team</strong></p> | |
| EOF; | |
| return [ | |
| 'mail' => [ | |
| 'from' => [ | |
| 'address' => $_ENV['SENDGRID_DEFAULT_SENDER_ADDRESS'], | |
| 'name' => $_ENV['SENDGRID_DEFAULT_SENDER_NAME'], | |
| ], | |
| 'replyTo' => [ | |
| 'address' => $_ENV['SENDGRID_DEFAULT_SENDER_ADDRESS'], | |
| 'name' => $_ENV['SENDGRID_DEFAULT_SENDER_NAME'], | |
| ], | |
| 'templates' => [ | |
| 'purchase' => [ | |
| 'plain' => $plainBody, | |
| 'html' => $htmlBody, | |
| ] | |
| ] | |
| ], | |
| ]; |
| php | |
| <?php | |
| declare(strict_types=1); | |
| namespace App\Mailer; | |
| use Psr\Container\ContainerInterface; | |
| use SendGrid\Mail\Mail; | |
| class SendGridMailMessageFactory | |
| { | |
| public function __invoke(ContainerInterface $container): Mail | |
| { | |
| $config = $container->get('config')['mail']; | |
| $mail = new Mail(); | |
| $mail->setFrom( | |
| $config['from']['address'], | |
| $config['from']['name'] | |
| ); | |
| $mail->setReplyTo( | |
| $config['replyTo']['address'], | |
| $config['replyTo']['name'] | |
| ); | |
| return $mail; | |
| } | |
| } |
| php | |
| \SendGrid\Mail\Mail::class => \App\Mailer\SendGridMailMessageFactory::class, |
| bash | |
| composer mezzio handler:create 'App\Handler\EmailSenderHandler' |
| php | |
| private \SendGrid\Mail\Mail $mail; | |
| private \SendGrid $mailer; | |
| private array $config; | |
| public function __construct( | |
| \SendGrid\Mail\Mail $mail, | |
| \SendGrid $mailer, | |
| array $config | |
| ) { | |
| $this->mail = $mail; | |
| $this->mailer = $mailer; | |
| $this->config = $config; | |
| } |
| php | |
| public function handle(ServerRequestInterface $request): ResponseInterface | |
| { | |
| $details = $request->getParsedBody(); | |
| $this->mail->addTo( | |
| $details['email_address'], | |
| sprintf( | |
| '%s %s', | |
| $details['first_name'], | |
| $details['last_name'] | |
| ), | |
| [ | |
| 'first_name' => $details['first_name'], | |
| 'last_name' => $details['last_name'], | |
| ] | |
| ); | |
| $this->mail->setSubject('Thank you for your purchase'); | |
| $this->mail->addContent( | |
| 'text/plain', | |
| $this->config['templates']['purchase']['plain'] | |
| ); | |
| $this->mail->addContent( | |
| 'text/html', | |
| $this->config['templates']['purchase']['html'] | |
| ); | |
| $response = $this->mailer->send($this->mail); | |
| return new \Laminas\Diactoros\Response\JsonResponse([ | |
| 'status' => $response->statusCode(), | |
| 'message' => $response->body() | |
| ]); | |
| } |
| php | |
| public function __invoke(ContainerInterface $container): EmailSenderHandler | |
| { | |
| $message = $container->get(\SendGrid\Mail\Mail::class); | |
| $mailer = new \SendGrid($_ENV['SENDGRID_API_KEY']); | |
| $config = $container->get('config')['mail']; | |
| return new EmailSenderHandler($message, $mailer, $config); | |
| } |
| php | |
| $app->route( | |
| '/', | |
| App\Handler\EmailSenderHandler::class, | |
| ['GET','POST'], | |
| 'home' | |
| ); |
| bash | |
| composer serve & |
| bash | |
| curl -X POST -d 'email_address=<your_email_address>&first_name=<your_first_name>&last_name=<your_last_name>' http://localhost:8080 |
| text | |
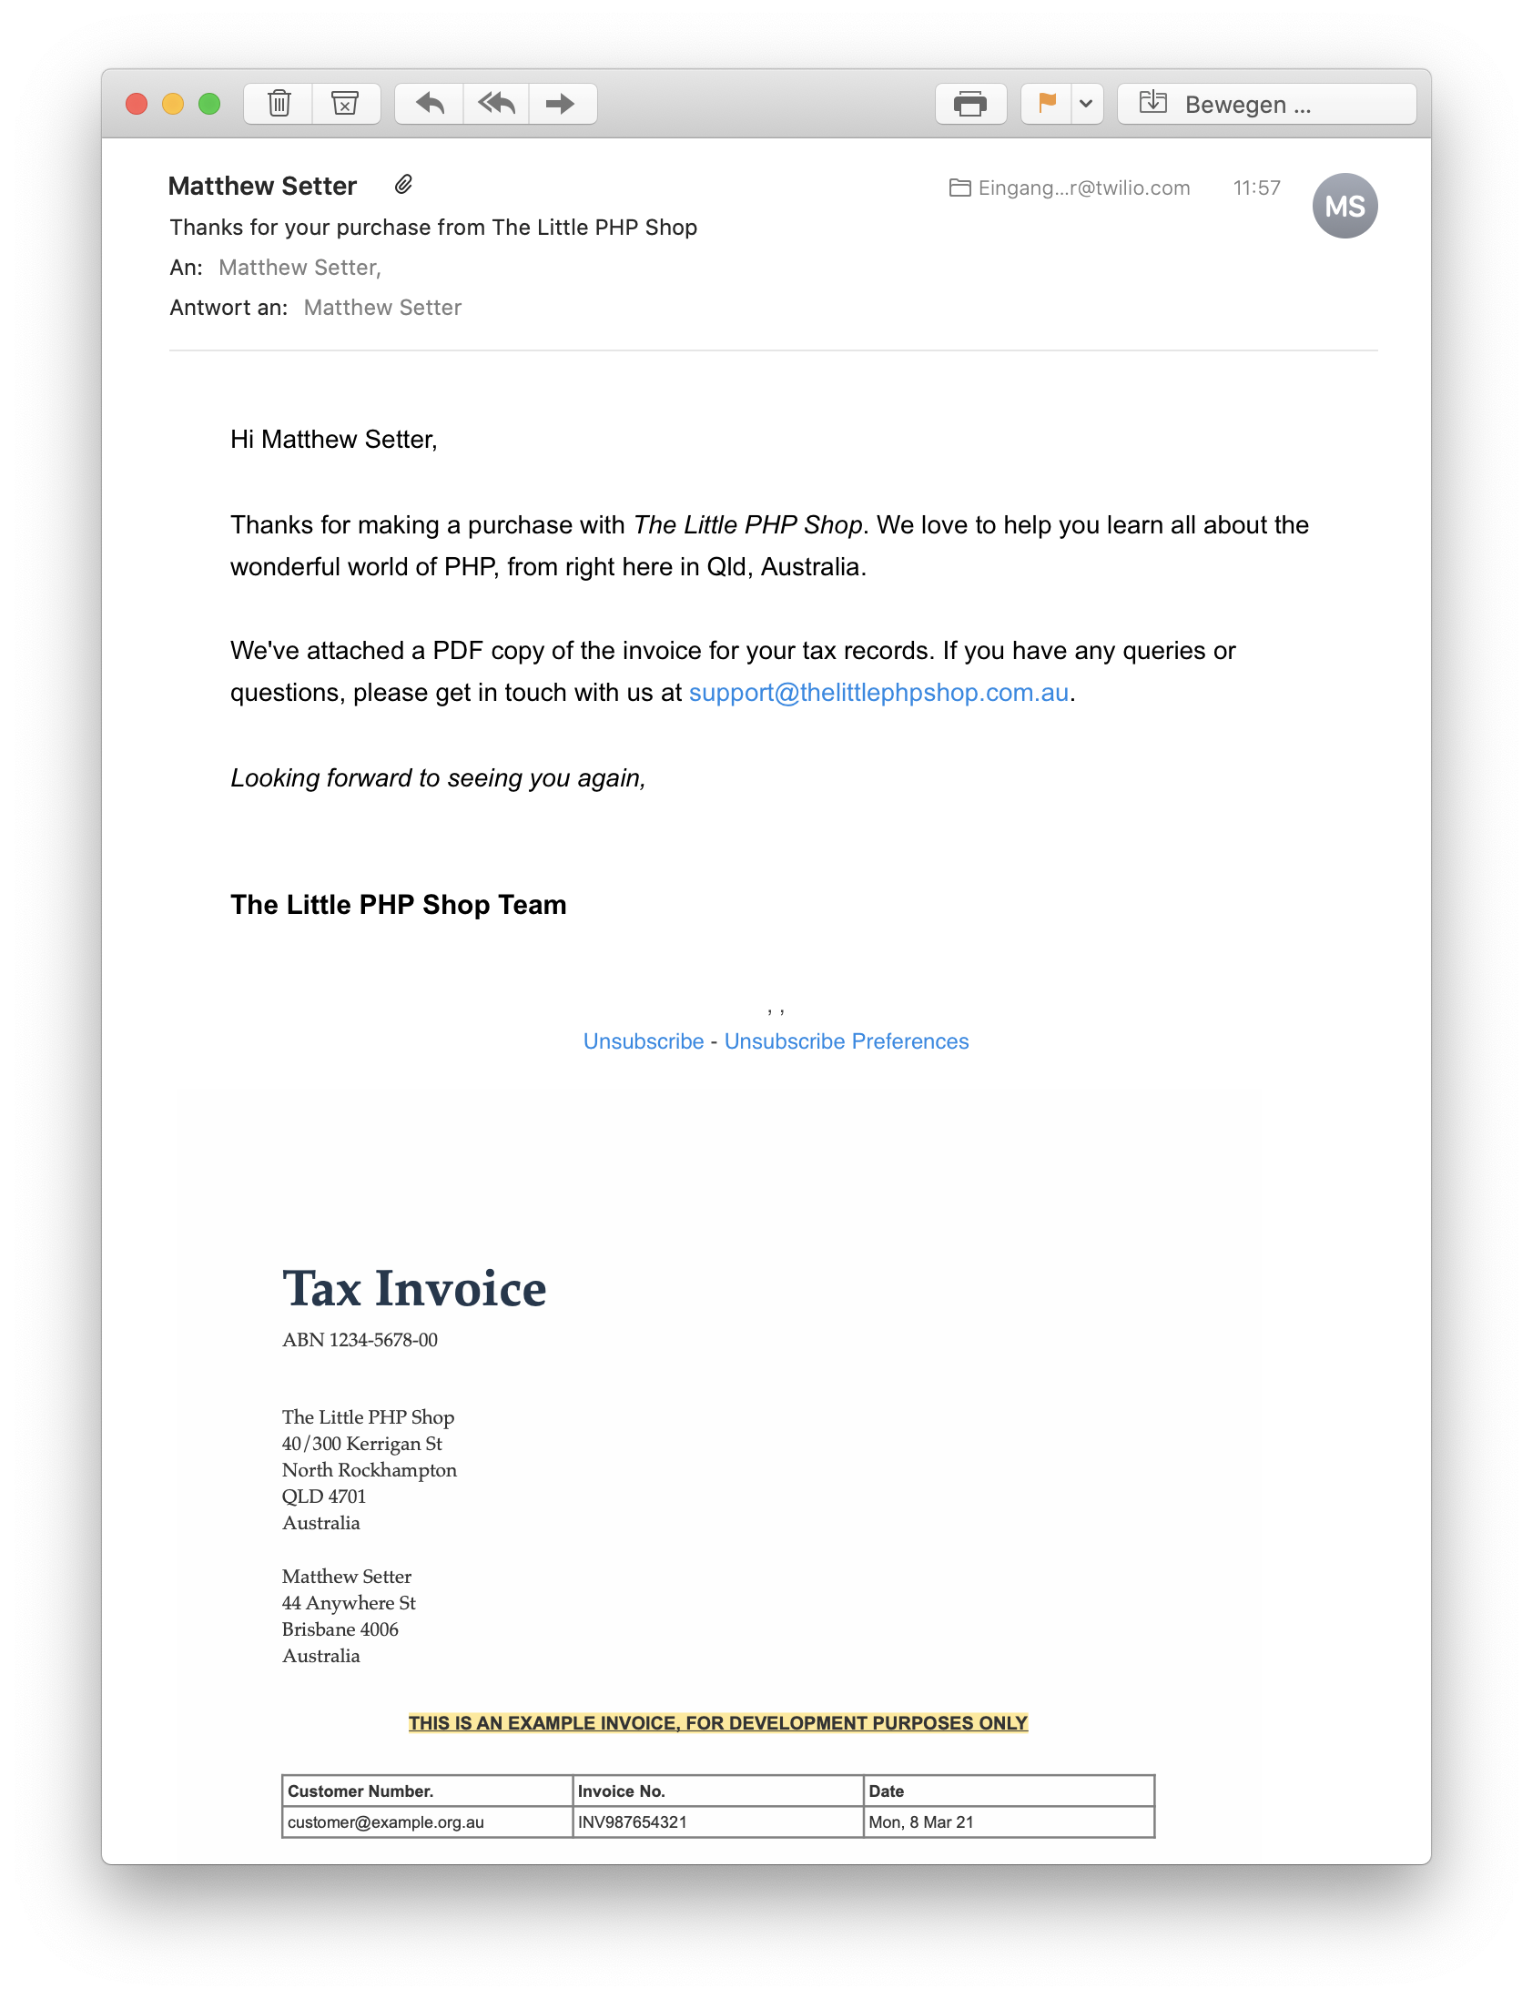
| Hi {{ first_name }} {{ last_name }}, | |
| Thanks for making a purchase with {{ sender_name }}. We love to help you learn all about the wonderful world of PHP, from right here in {{ sender_state }}, {{ sender_country }}. | |
| We've attached a PDF copy of the invoice for your tax records. If you have any queries or questions, please get in touch with us at {{ support_email }}.. | |
| Looking forward to seeing you again, | |
| {{ sender_name }} Team |
| php | |
| 'sender' => [ | |
| 'sender_name' => 'The Little PHP Shop', | |
| 'sender_address' => '40/300 Kerrigan St', | |
| 'sender_city' => 'North Rockhampton', | |
| 'sender_state' => 'Qld', | |
| 'sender_zip' => '4701', | |
| 'sender_country' => 'Australia', | |
| ], | |
| 'support_email' => 'support@thelittlephpshop.com.au', |
| php | |
| $this->mail->addSubstitutions($this->config['sender']); | |
| $this->mail->addSubstitution( | |
| 'support_email', | |
| $this->config['support_email'] | |
| ); |
| php | |
| 'templates' => [ | |
| 'purchase' => [ | |
| 'template_id' => '<the template’s id>', | |
| ], | |
| ] |
| php | |
| $this->mail->setTemplateId( | |
| $this->config['templates']['purchase']['template_id'] | |
| ); |
| php | |
| $invoice = file_get_contents( | |
| __DIR__ . '/../../../../data/Example-Invoice.pdf' | |
| ); | |
| $this->mail->addAttachment( | |
| $invoice, | |
| 'application/pdf', | |
| 'invoice-2021-010101.pdf', | |
| 'attachment' | |
| ); |