
Send With Confidence
Partner with the email service trusted by developers and marketers for time-savings, scalability, and delivery expertise.

Time to read: 11 minutes
While there are plenty of tutorials on the Internet about sending emails, there is very little on how to configure an application to receive them and process them. This is a task that can be incredibly difficult if you are trying to set everything up by yourself, but it is as easy as receiving a web request when using Twilio SendGrid’s Inbound Parse feature.
In this short tutorial you are going to learn how to have Twilio SendGrid forward your emails directly to your web application, using Python and the Flask web framework.
These are the requirements to complete this tutorial:
Before Twilio SendGrid can accept emails on your domain you have to authenticate it, so that Twilio SendGrid knows the domain is under your control.
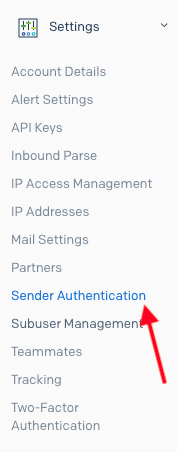
To authenticate your domain, log in to your SendGrid account, and in the left-side navigation bar open “Settings” to then select Sender Authentication.
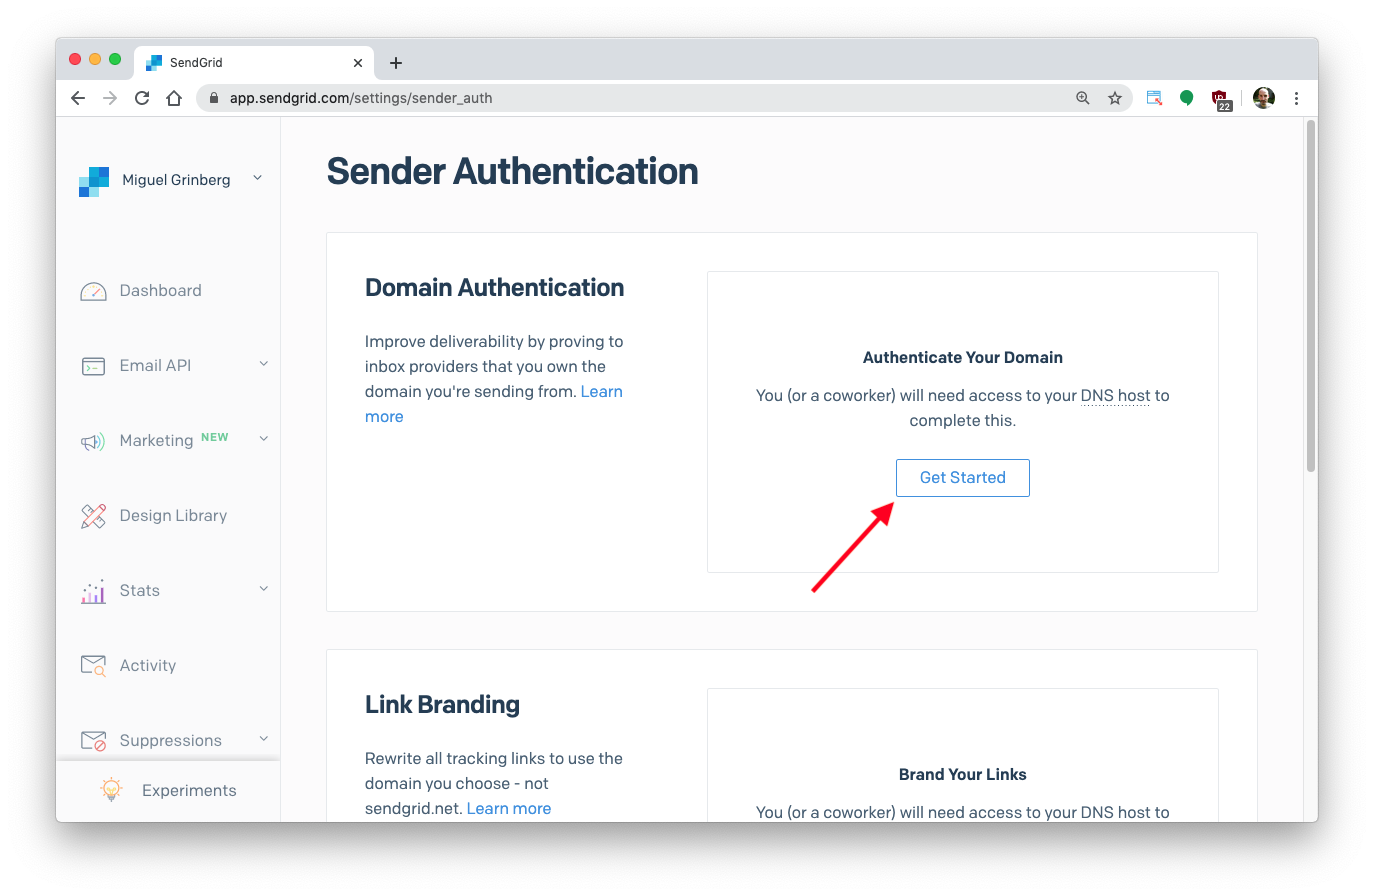
In the Sender Authentication page click the “Get Started” button in the “Domain Authentication” section.
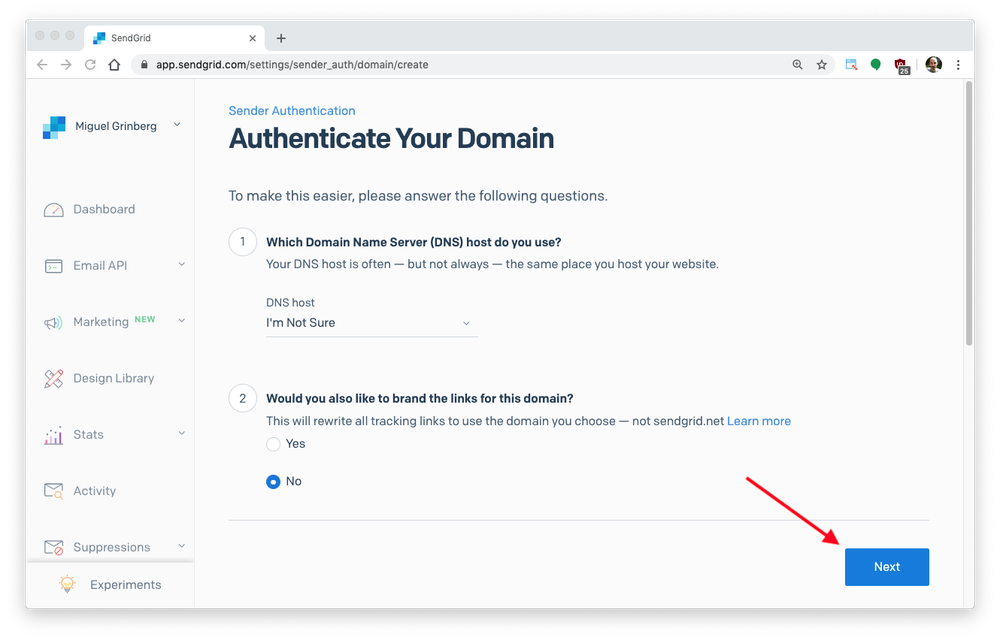
You will be asked to select your DNS provider, which in most cases is the same company from which you purchased your domain. If your DNS provider does not appear on the list, or if you don’t know who they are, just select “I’m Not Sure.”
You will then be asked about adding branding to links that appear in outgoing emails. This isn’t a topic we are concerned with at this time, so select “No.” You can enable this option at a later time if you want to use it.
Click the “Next” button to continue on to the next page.
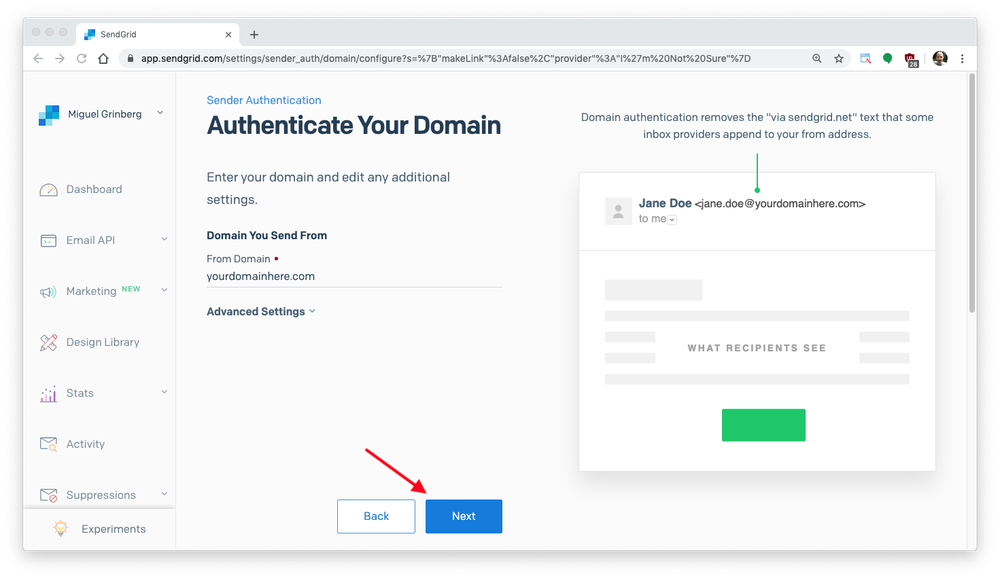
In the following page you will be asked to provide your domain name. I entered yourdomainhere.com, and you will need to enter the domain that you intend to use. You do not need to change anything in the “Advanced Settings” section.
Click the “Next” button to proceed.
The page will now display 3 new DNS records that you need to add to your domain configuration, each with a type, a hostname, and a value. For your convenience, the host and values can all be copied to the clipboard. Below you can see the settings that I was given. Yours are going to be similar, but with your own domain name in them:
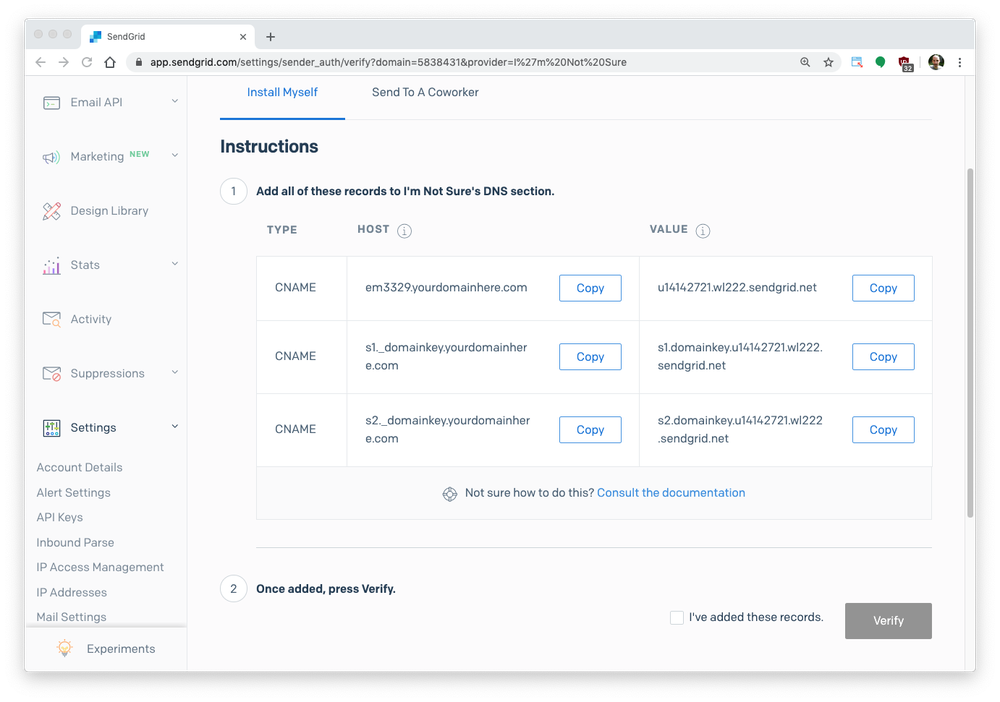
The next step is going to be different depending on your DNS provider. Visit your domain’s configuration page and find where the DNS settings are edited.
The screenshots below are for Google Domains. You can see how I added the first of the three DNS records in the following image. Note that the 3 records with names @, ftp, and www records are unrelated to this tutorial and were already set on my domain.
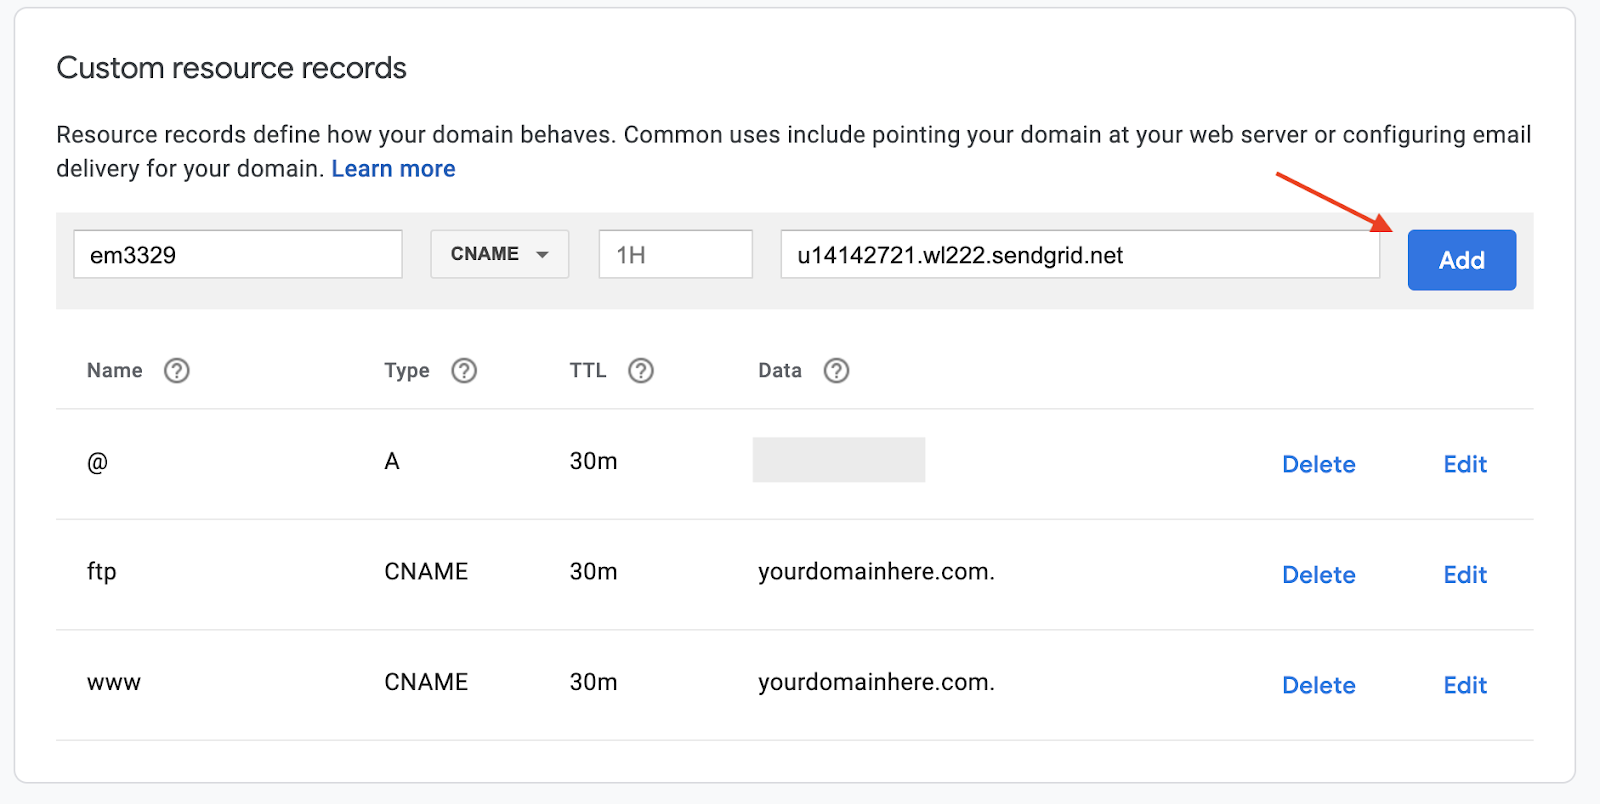
Be careful about how you enter the DNS record name. While some providers expect a fully qualified name for your DNS records, as shown by SendGrid, others expect just the portion before the domain name. For example, the record that SendGrid showed as em3329.yourdomainhere.com had to be entered as em3329 on Google Domains. Check your other DNS records and be consistent in how you enter these new ones.
Here is how the 3 new DNS records looked after I entered them:

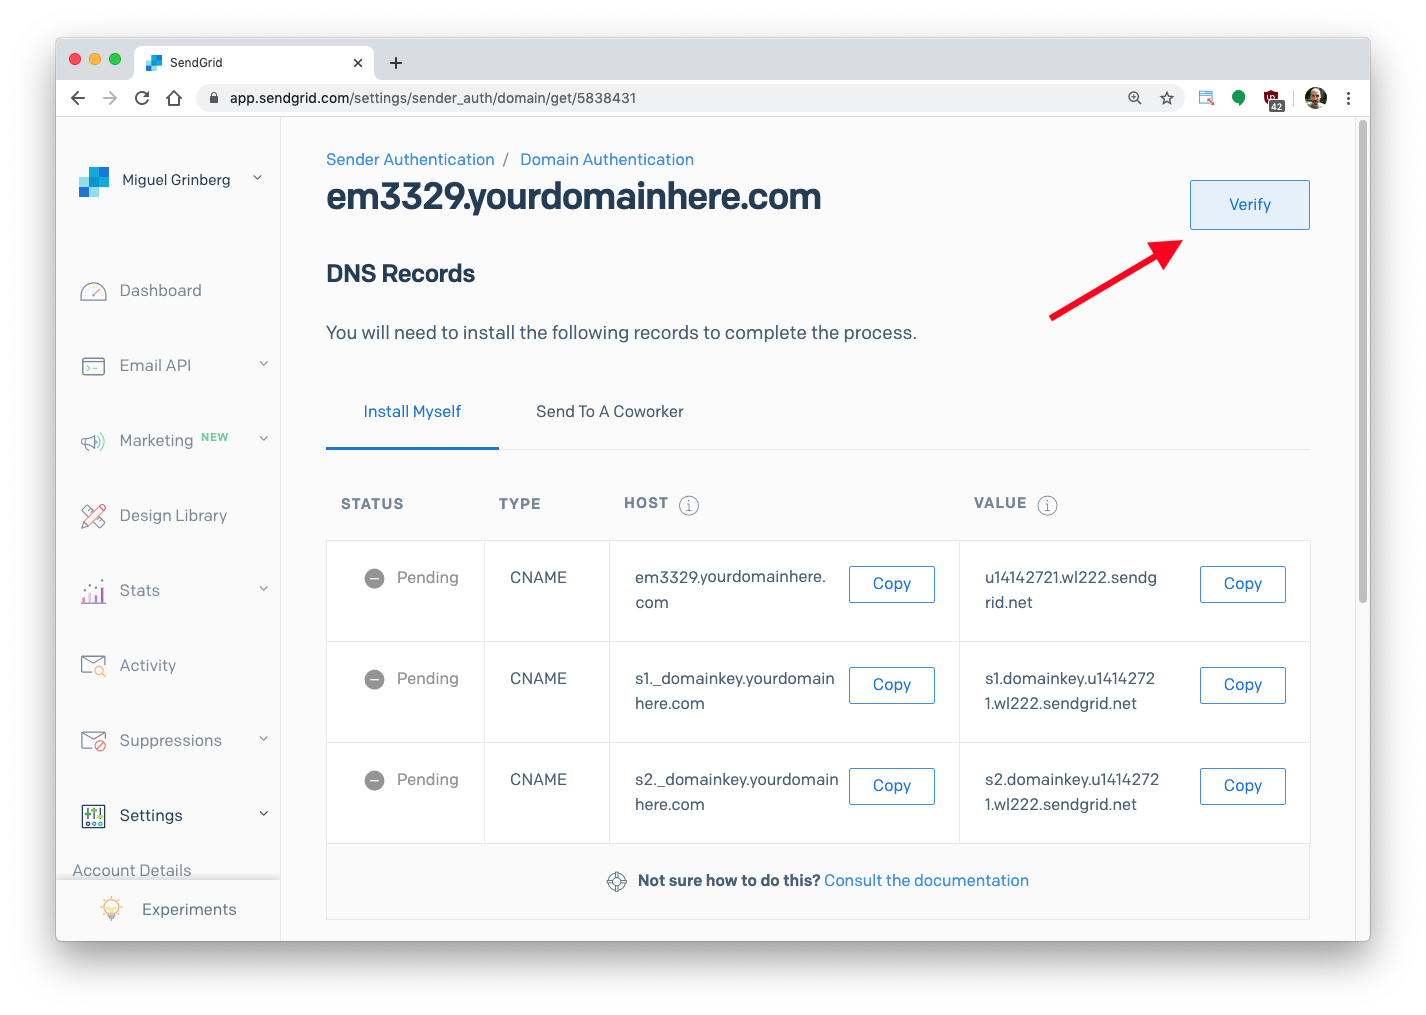
Now go back to the SendGrid Sender Authentication page, where your domain is going to appear as pending. Click on it to proceed with the authentication process.
In the next screen, you will see the 3 DNS records. Click the “Verify” button on the top right of the page to have SendGrid pull your DNS records and confirm that you have added the requested entries.
If SendGrid is able to verify your domain, you will get a “It worked!” page:

If, on the other hand, SendGrid cannot verify your DNS entries, you will need to try again later. Every time DNS changes are made it takes some amount of time for the changes to propagate across DNS servers. A failure right after editing your DNS entries just means that you need to give it a bit more time before you hit the “Verify” button again. Note that it can take up to 48 hours for DNS to fully propagate, though it usually takes a lot less time.
Once you get the “It worked!” page you are well on your way to get emails posted to your Flask web application.
Now we are ready to write a simple Flask web application where SendGrid can forward our emails.
Following Python best practices, we are going to make a separate directory for our project, and inside it we are going to create a virtual environment. We then are going to install the Flask framework on it.
If you are using a Unix or Mac OS system, open a terminal and enter the following commands to do the tasks described above:

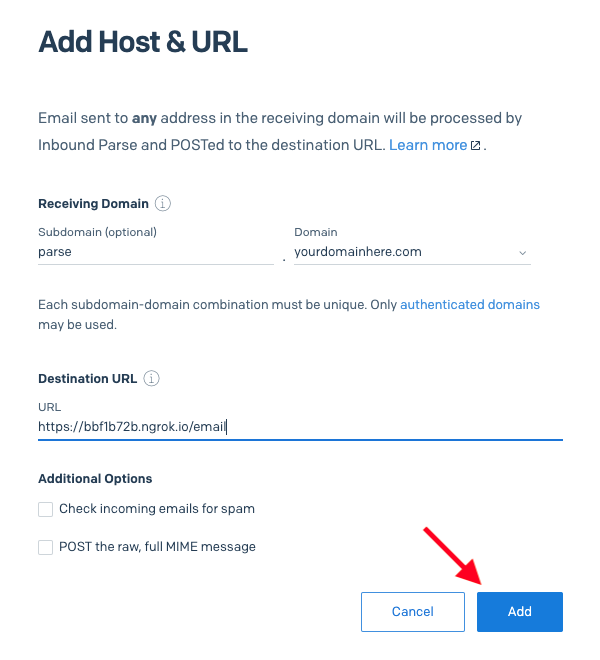


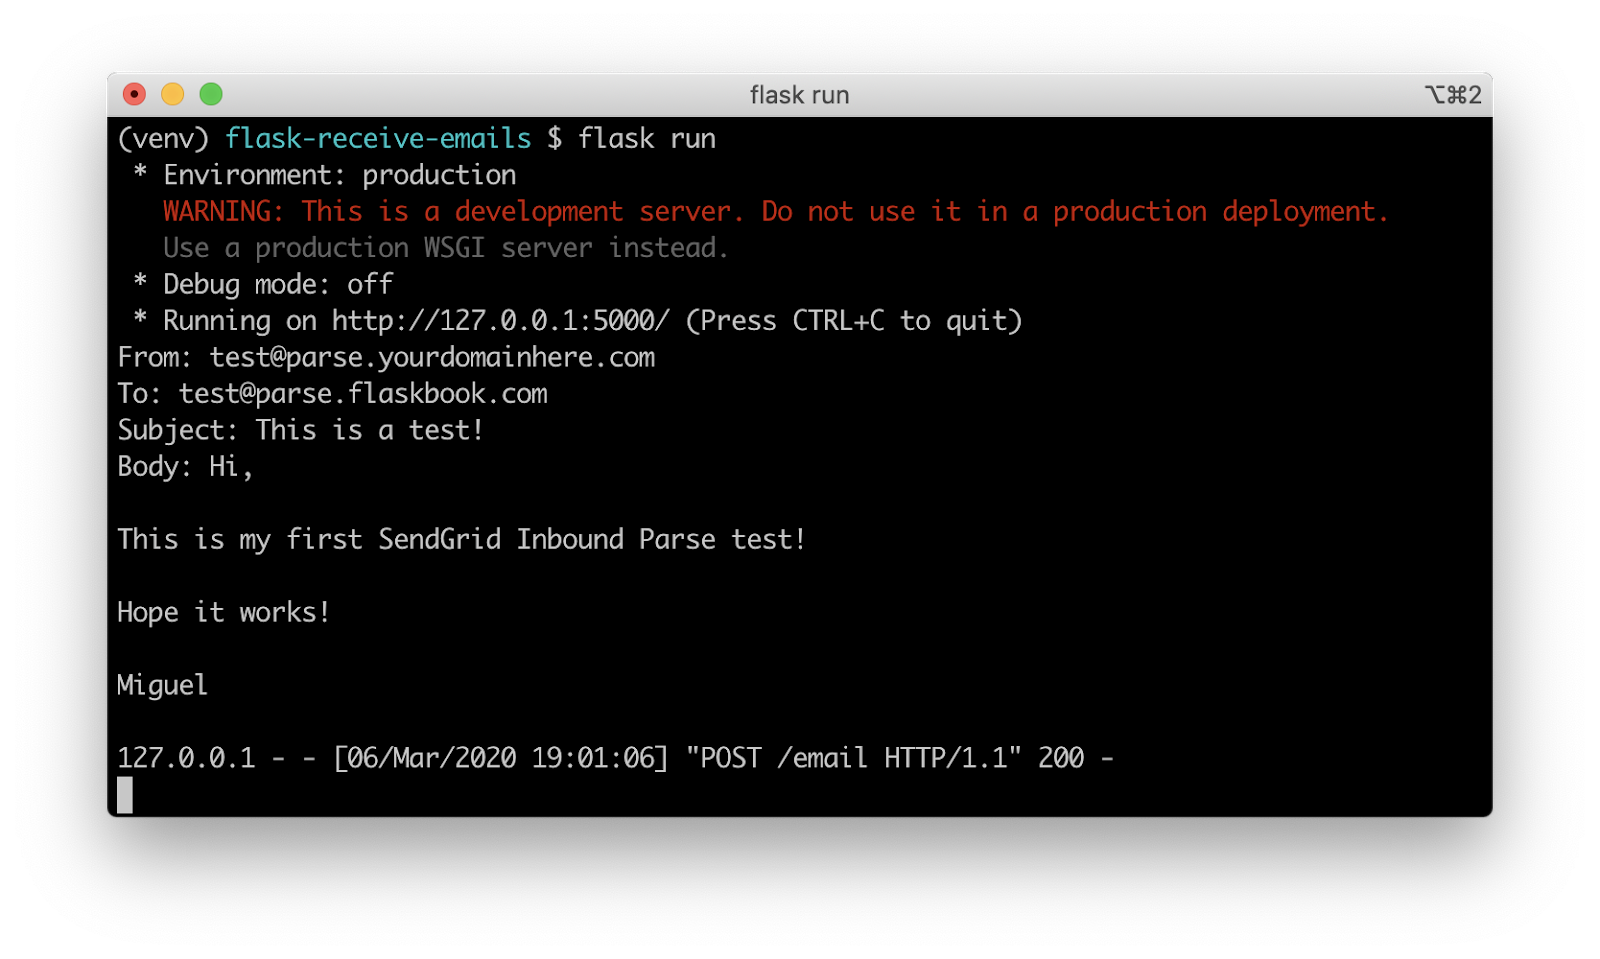
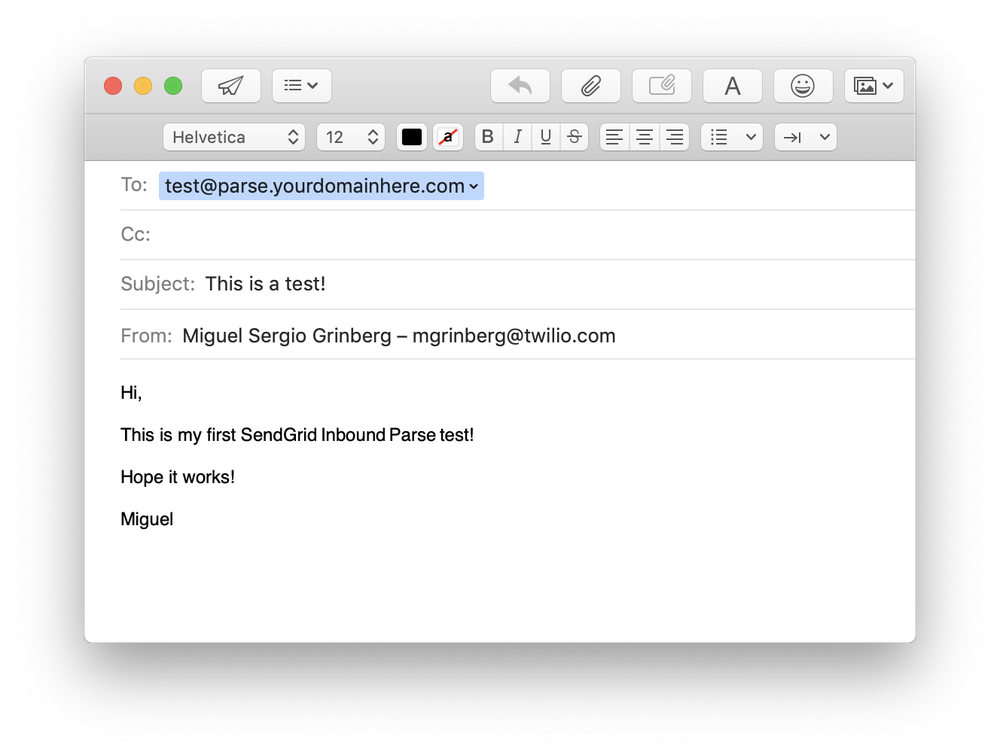 Wait a minute or two for SendGrid to receive the email and forward it to the ngrok webhook URL, which in turn will pass it on to the Flask’s /email endpoint. As you’ve seen above, the simple endpoint that I wrote in the Flask application prints the email data received to the console:
Partner with the email service trusted by developers and marketers for time-savings, scalability, and delivery expertise.
| $ mkdir flask-receive-emails | |
| $ cd flask-receive-emails | |
| $ python3 -m venv venv | |
| $ source venv/bin/activate | |
| (venv) $ pip install flask |
| $ md flask-receive-emails | |
| $ cd flask-receive-emails | |
| $ python -m venv venv | |
| $ venv\Scripts\activate | |
| (venv) $ pip install flask |
| from flask import Flask, request | |
| app = Flask(__name__) | |
| @app.route('/email', methods=['POST']) | |
| def receive_email(): | |
| print('From:', request.form['from']) | |
| print('To:', request.form['to']) | |
| print('Subject:', request.form['subject']) | |
| print('Body:', request.form['text']) | |
| return '' |
| (venv) $ flask run | |
| * Environment: production | |
| WARNING: This is a development server. Do not use it in a production deployment. | |
| Use a production WSGI server instead. | |
| * Debug mode: off | |
| * Running on http://127.0.0.1:5000/ (Press CTRL+C to quit) |
| $ ngrok http 5000 |