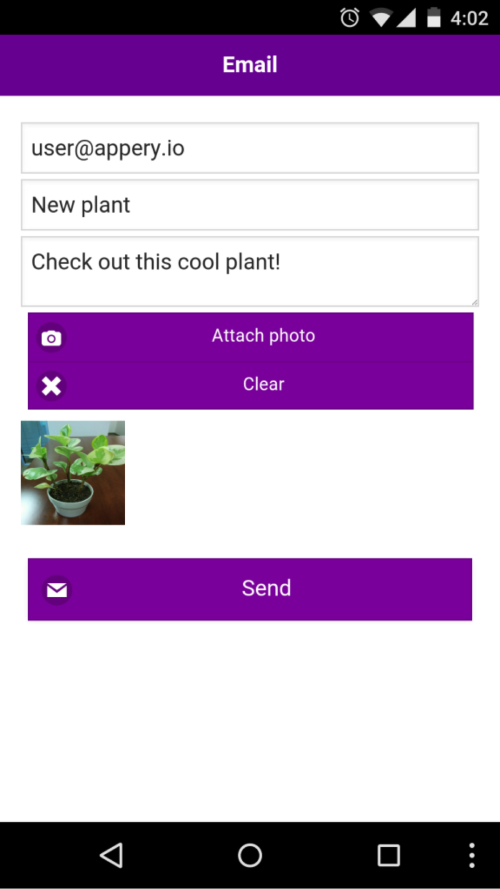
The first step is to create a new app in Appery.io:
- Once you are inside the platform, click the Create new app button. For app name, enter: SendGridApp (default PhoneApp option selected) and click the Create button.
- From the Project view, click on Pages > startScreen. The device screen will open. The page should look like this:
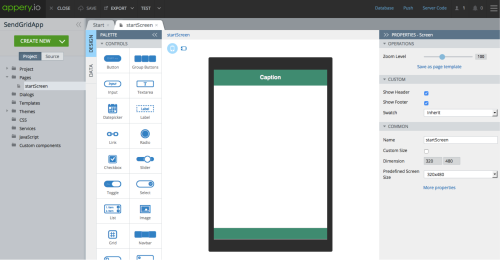
You’ve just created a brand new mobile app. That was easy, right?
Now that you have a new app, you are going to add the SendGrid plugin.
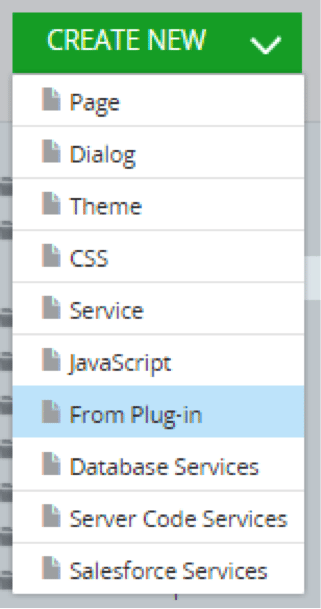
1. To import the plugin, click Create New > From Plug-in:
2. In the Communication category, you’ll see the SendGrid Mail API:
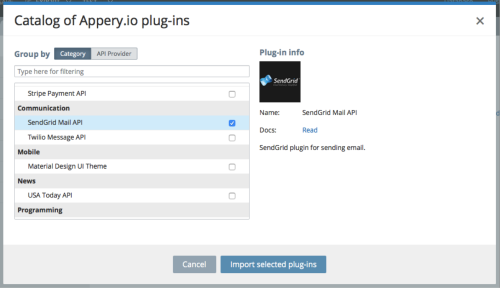
3. Click Import selected plugins.
4. You’ll be asked whether you want to set the start page. Go ahead and select mail page. You always change the start page by going to Project > App settings > General.
5. This step is optional, but you can also change the theme used in this app.
a. Go to Project > App settings > General
b. For Theme, select material-design
6. Open Pages > mail page. The page will look like this (using the material-design theme):
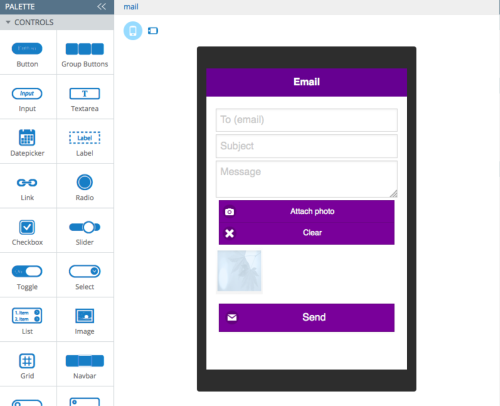
The plugin contains a sample app. To test the app, you need to configure the SendGrid API plugin. You are going to do this next, but first, you need to make sure your SendGrid account information is protected.
When you sign up for a SendGrid account you get a username and API key (your password) to use when invoking the API. You want to keep this sensitive information on the server because if someone gains access to this information, they will be able to send emails using your account. The secure proxy will protect this information so it’s never visible in the client.
The first step to creating a secure proxy is to create a database that will store the username and password.
1. From the App Builder, click Database (in the toolbar) or go to http://appery.io/database.
2. Click Create new database. For the database name, enter: SendGridDB. Click Create.
3. Now you need to create a new collection. Click Create new collection. Name the collection Credentials.
4. Click +Col to create a new column. Name the column: key.
5. Create another column and name it: keyValue.
6. Now you are going to enter the SendGrid keys into the database.
a. Click +Row and enter api_user_proxy and its value (that’s your username).
b. Repeat the same for the api_key. Click +Row and enter api_key_proxy and its value (that’s your password). Your collection should look like this:

With the data saved in the database, it is now secured and private. Next, you are going to create the secure proxy which will use the data you just saved in the database:
1. Click on Secure Proxy tab or go to http://appery.io/proxy.
2. Click Create new proxy, name the proxy SendGridProxy. Click Create.
3. In the proxy setting page, check Use proxy + store sensitive (private) data in database.
4. For Database, select SendGridDB.
5. For Collection, select Credentials.
6. For Key column, select key and for Value column, select keyValue.
7. Click Save.
The last step is to configure the service to use this proxy. The plugin has one service, SendGrid_Mail, to send email, so there are just a few things you need to configure:
- Inside the App Builder, open Services > SendGrid_Mail service.
- For Use Appery.io proxy, click the refresh button to load the new proxy you just created and select it (SendGridProxy).
- Switch to the Request tab. This tab contains all the service request parameters. You will also notice that the service will be getting the api_user and api_key from the proxy. The one request parameter you need to set is from. This is your “from” email.
The
Request tab looks like this:
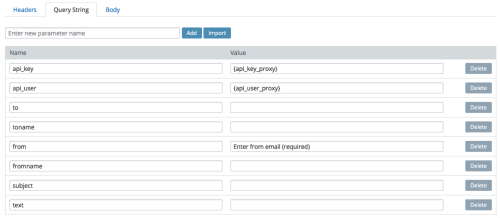
- api_key – SendGrid API key (your password). Saved in Appery.io database for security
- api_user – SendGrid username. Saved in Appery.io database for security
- to – to email
- toname (optional) – to name
- from – from email
- fromname (optional) – from name
- subject – email subject
- text – email text
You can modify the service and add more request parameters supported by the
SendGrid Mail API.
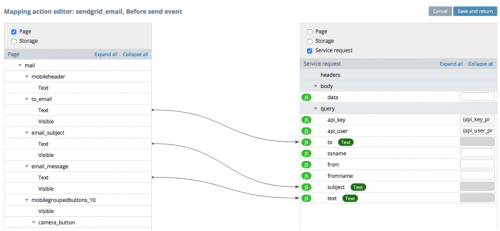
Besides
from (and optional
toname and
fromname) you don’t need to set the values in the service as they will be mapped from the page. This is how the mapping looks on the page (
Pages > mail > Data > sendgrid_email service > Before send mapping):
If you want to learn more about the plugin, modify the sample app, or send an email without an attachment, please read the
plugin documentation.
You are ready to test the app.
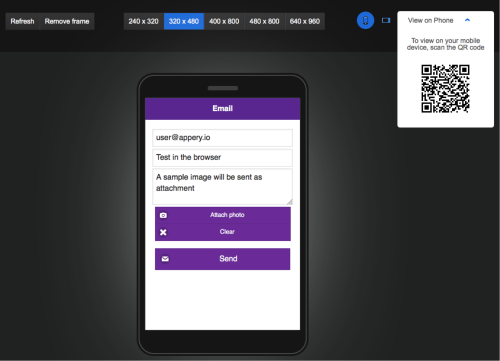
1. Click the “Test” button to launch the app in the browser.
a. If you test the app in the browser, you can’t invoke the camera. You can still send a message; a sample image created in Project > JavaScript > SampleImageScript will be sent instead.
2. To use the camera, the fastest way is to use the Appery.io Tester app, or install the app on a device.
This is testing the app on an Android device:

Testing the app in the browser (you can scan the QR code to launch the app on your device in the browser):
To learn more about the plugin, please visit the plugin
documentation page. You can also add any other
SendGrid APIs to your app.
In addition to Appery.io App Builder, you also get integrated backend services such as a cloud database, push notifications and server scripts to write custom business logic for the app.
Building apps with in-app email capability with SendGrid and Appery.io is fast and simple. The SendGrid API plugin can be quickly integrated, tested and secured when building a mobile app in Appery.io.
About the author: Max Katz heads Developer Relations for
Appery.io, a cloud-based mobile app platform. He loves trying out new and cool REST APIs in mobile apps. Max is the author of two books “
Practical RichFaces” (Apress 2008, 2011),
DZone MVB (Most Valuable Blogger), and is a frequent speaker at developer conferences. You can find out what Max is up to on his blog:
http://maxkatz.org and Twitter:
@maxkatz.
