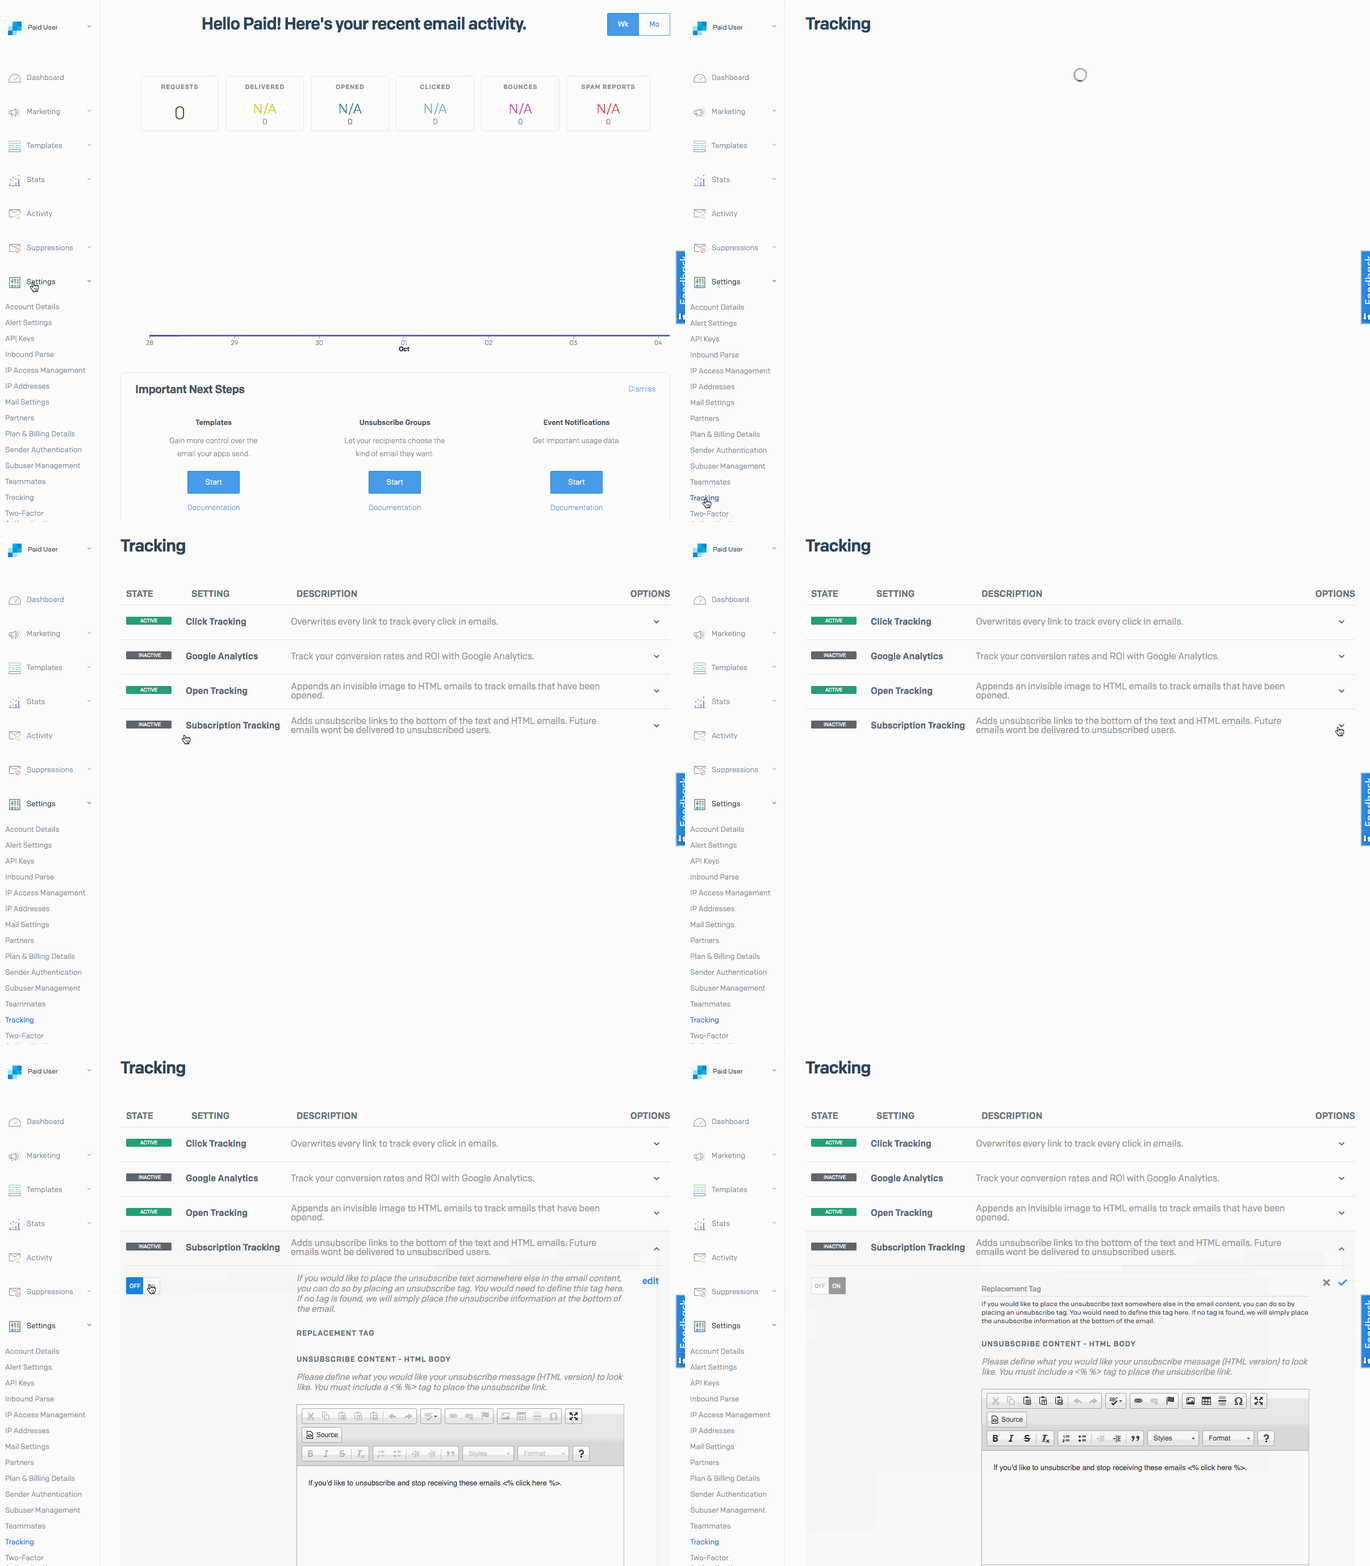
Unsubscribe via Subscription Tracking
- Automatically add an unsubscribe link to the bottom of your emails.
- Customize the unsubscribe link that is added automatically
- Create a replacement tag that will allow you to put the unsubscribe link anywhere you would like using HTML.
- Automatically incorporates the list-unsubscribe header in your emails.
From your Account Overview page, visit the sidebar menu and click "Settings". From there, select "Tracking". Locate the Subscription Tracking option and click on the arrow on the right side and click on the "Off/On" button.

Just enable the setting! Once enabled, we'll add the default unsubscribe link to the bottom of your emails.
Assuming that you have the setting enabled already, go into the app's settings. To add your own wording, edit the text within the "Unsubscribe Content" boxes.
The first box to edit is for HTML formatted emails.
Notice that the words "click here" are wrapped with a <% %> symbols. This tells our system to link the words within the symbols to the unsubscribe URL. These will be the words that will be "clickable" in order to unsubscribe.
In this example, people will click "click here" in order to unsubscribe.

Change the Plain Text content as well. There won't be any clickable wording here though, since that is an HTML feature. The symbols <% %> will insert the unsubscribe URL. Users viewing the email in Plain Text will be able to click that URL in order to unsubscribe from your emails.

Note: It is important to have the <% %> symbols in the plain text body version in order for the links to be added.
This requires adding a HTML code snippet to the body of your email using the Replacement Tag field within the Subscription app's settings. Set a replacement tag within the replacement tag field. {i.e. [unsubscribe]}

Doing this will allow you to use that tag within the html. This tag will get replaced with the unsubscribe URL. So, to create your unsubscribe link, just use some simple HTML.
<p>If you would like to stop receiving these emails <a href=”[unsubscribe]”>click here</a></p>
This section allows you to create a page that appears once the unsubscribe link is clicked. So, once a recipient clicks the unsubscribe link, they will get redirected to this landing page you have created.

