I have been
playing with Google Glass lately, which got me working more with Android. Since I recently built my first native Android app, I thought I'd share how to send email and retrieve statistics using the
SendGrid Java library. Since this is my first attempt, please send a pull request or open an issue if I did something unholy. You may find the complete source code at
Github.
If you are not interested in native Android development, check out our
tutorial based on the AppMobi platform.
If you are new to Android native development, I suggest you start with the tutorial at the
Android Developer website. Complete all lessons under “Building Your First App.”
If you want to skip straight to the end with a working app, clone
this repo, modify the
UtilsDEFAULT.java, import the project into Eclipse and click the run icon. Otherwise, the following steps assume you have completed the
Android tutorial, ending on
this lesson.
First, set up the
default string constants.

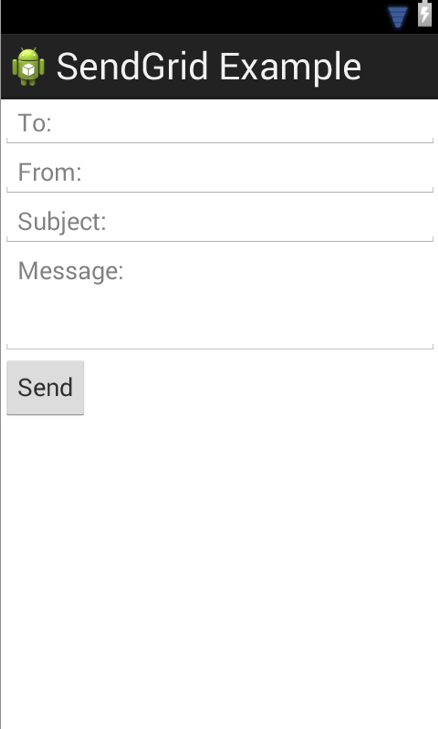
Next, we will create a simple form that will collect the information we will need to send an email.
Here is the XML used to create the form, update yours accordingly. When complete, the graphical layout should look like the above.
Now, we need to set up a page where the results will appear when you click the send button on the input form.
This is the XML required for the display.

Your graphical layout should look like the above.
First, we have to make sure we add permissions for our app to access the Internet for our Web API calls. This is done with the
uses-permission tag,
like so.
Download the
SendGrid Java library (I am using version 0.1.2 for this tutorial) and
sign up for a SendGrid account if you don’t have one. Use
these instructions to add the library to your project.
The code that sends an email is in the
MainActivity.java file.
You will need to import the SendGrid Java library as follows:
import com.github.sendgrid.SendGrid;
import com.thinkingserious.sendgrid.R;
Next, you will create the class
SendEmailWithSendGrid. Note that I only implemented a subset of the API. Check out the full capabilities of the
SendGrid Java API on Github.
Finally, you will tie the results from the form to the API call via the implementation in the
sendMessage function.
The
DisplayMessageActivity.java file contains the implementation that displays the results from our email send. However, instead of just returning the status of our email send, we will include a few statistics.
The class
StatsFromSendGrid will handle the call to our Web API. For a complete view of what the stats endpoint has to offer, please review the
documentation.
Finally, we need to modify the
onCreate function, which gets called from the
sendMessage function, that itself gets called when the button is clicked.
At this point you should have a working app that can send an email and display statistics via SendGrid.
Now that you understand how to integrate SendGrid into a native Android app, we want to know what you create. Be sure to let us know so that we may feature you in our
Developer Community.
Happy Hacking!


