The
SendGrid Parse Webhook is a powerful tool with
many use cases. Once set up, all incoming email for a domain or sub-domain is directed to your application. What you can do is endless, but it can be a bit tricky to grok if it is your first time.
In this tutorial, I am going to take away any confusion and show you how to set up your first SendGrid Parse API implementation.
Sometimes, it helps to have a full working example so I've created one for you. It's built in Node.js, and you can find it
on GitHub.
We are going to use it in this tutorial to speed up your learning process. It is also great for your
hackathon toolbox where you need to move fast.
Begin by cloning the repository and changing into its directory.
$ git clone https://github.com/scottmotte/sendgrid-parse-api-example.git
$ cd sendgrid-parse-api-example
Next, set up your credentials.
$ mv .env.example .env
Change the contents of
.env to your username and password.
SENDGRID_USERNAME=your_sendgrid_username
SENDGRID_PASSWORD=your_sendgrid_password
Run the app.
$ npm install
$ node app.js
Using a local tunnel will save you a lot of time because you can test locally. My favorite choice is
ngrok. Ngrok is a tool to tunnel our local server to the web. It's necessary because the email is coming from the web--our personal email outbox on gmail, yahoo mail, or wherever. The alternative of deploying code to a live server is more time consuming.
$ wget https://dl.ngrok.com/darwin_amd64/ngrok.zip
$ unzip ngrok.zip -d /usr/local/bin
$ ngrok 3000
(instructions above are for a Mac. see the
install instructions here for other operating systems.)
The next step can either take a 5 minutes or up to 48 hours.
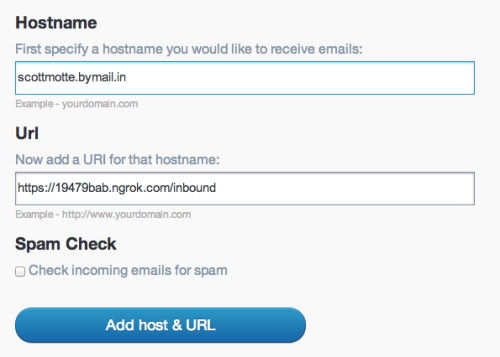
Set your
SendGrid Parsing Incoming Emails setting. For the hostname put
your-sendgrid-username.bymail.in. For the url put
https://your-ngrok-url.ngrok.com/inbound. (The bymail.in address has already been setup with the
mx.sendgrid.net MX record.)
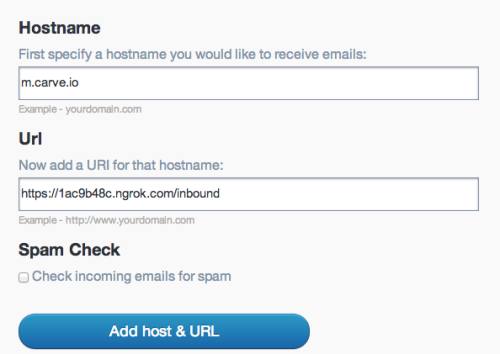
At a hackathon, the five minute approach makes sense. For production apps, you'll want to run email through your own domain, where the MX records can take up to 48 hours to propagate. Set your
SendGrid Parsing Incoming Emails setting with a hostname of your choice and with the url of
https://your-ngrok-url.ngrok.com/inbound.
Now you have to configure an MX record on the hostname you set above to point to
mx.sendgrid.net. It should look something like the following.

Wait 1-48 hours. This is the most discouraging part, but it is just the way the internet works. It can take up to 48 hours for MX records to propagate around the world.
From your personal email account send an email to
inbound@the-hostname-you-setup.com. The app you have running will intercept it, parse it, and deliver the contents back to you. It could take up to 1 minute to arrive.
Congrats you just learned how to setup the SendGrid Parse API!
You've done the hard work of getting the email into your application. You can now parse it however you wish.
Start customizing the code in
routes/inbound.js. For example, save the body of the email to a database or trigger an event based on a keyword in the subject of the email. The logic is up to you.
For more details on this feature, check out our docs page: Setting Up the Inbound Parse Webhook.