Double Opt-In Email With Node.js


September 29, 2014
Written by
SendGrid Team
Contributor
Opinions expressed by Twilio contributors are their own

Double Opt-In Email With Node.js

email5-300px

To get a good reputation as a sender, one of the email best practices we encourage our users to implement is the double opt-in. It’s actually a very simple practice: after a user gives you his/her email, you store their information with an authentication token and a boolean variable.

The authentication token is just a randomly generated value. After the user signs up for your newsletter or service, you want to send a simple email asking them to click on a link. This link will have their token and take them to a URL that will make a request to the database, search for the same token, and set that user's boolean variable to "true." This means they have a good email address and you can start sending email to them.

So, how do you do it? Even though I described it in one paragraph, and it's as simple as it sounds, I decided to go ahead and make a Node.js application example. You can find the complete example here, but let's build it step by step!

First Things First

Make sure you have Node.js, npm, and mongodb installed. To make this as easy as possible, we’re using express project generator, so open your terminal and run:

npm install -g express-generator

We’re going with the default project template, so run:

express node-emailauth

That will create your project and give you some extra instructions. We'll follow them:

cd node-emailauth && npm install

Then we'll test the project to see what we got. Run:

npm start

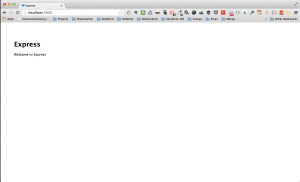
Open your favorite browser and go to http://localhost:3000. You should see the following page:
screenshot1

Awesomesauce!

Creating the Pages and Routes

Now, let’s create the routes we’ll need for our app. In the first screen, the user will be able to input their email address into a form and submit it. The second screen will load after the form is submitted, confirming that they were sent an email. The final screen will be accessed after the user clicks the link inside the email sent to them, showing that the address is confirmed.

We already have our first screen, so let’s adjust it to accept the user’s email. Go to the views folder and open the file index.jade. The default express project uses the jade templating engine for HTML, so we’ll stick with that. Replace the contents with the following:


Now let’s create the routes for our two other pages. Open app.js and add under: app.use('/users', users);


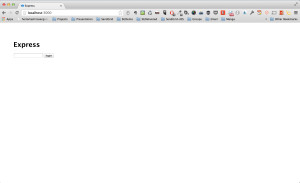
If you run the app you should see:

screenshot2

If you fill the field and press "login" you should see the email in the console and the next page. You could also access the URL http://localhost:3000/verify_email?token=jajaja and see the ‘jajaja’ token printed to the console.

Connect the Database

Next step, let’s connect a database to our application and start storing information! We’re gonna use mongodb for that, so make sure you have it installed. Open another terminal and run:

mongod

Go back to your other terminal window in your app folder. We’re gonna use the mongoose module to help us play with mongodb. Install it by running:

npm install mongoose —save

—save will automagically add mongoose to our package.json file. Now let’s go back to app.js and make some changes. Import mongoose into our app and connect to the database:

var bodyParser = require('body-parser');

Add:


This should get us connected to our local mongodb. Now let’s create our user model. Immediately after the end of mongoose.connect, add:


Like I described in the beginning, all we need for this app is the user email, which is required and unique, an authentication token, which is also required and unique, and a boolean variable telling us if the user is authenticated or not.

We should be good to go to start storing some information inside our database! Go back inside the two routes and do some magic there. We’ll start with our login route:


We’re using Node's crypto module to create a hash, and using it as the user authentication token. To use it, we must first import it into our app, so let’s go back to the line where we imported mongoose, and under it, copy:


Now, running our app, typing your email and hitting login will create a new user based on our model, and store it in the database. In case you want to remove every user from your database, you can open a new terminal window and type:

mongo node-emailauth db.users.remove({})

Update the verify_email route next. Change it to:


We can already do a test with our app! So if we run it, add our email and hit login, you can see our user being logged to the console like this:

{ __v: 0, email: 'heitortsergent@gmail.com', authToken: 'ac1e77e645fbf5c17ea278f5e25390e8c2bfcbfe', isAuthenticated: false, _id: 540e0ba40af5c087eb7c2167 }

Now if you copy that authToken, and paste it into the following URL 'http://localhost:3000/verify_email?token=', you should see in your console the message 'successfully updated user’ and the same user printed with the "is Authenticated" property set to true.

We’re almost at the end! All that’s left is to actually send our awesome emails to the user. We'll use SendGrid to do that. :) First off, let’s install the sendgrid module by running:

npm install sendgrid —save

Add it to our app by adding under our crypto import:


All we have to do next is add our two snippets to send email. One with a link the user can click, the other confirming that the user’s email is authenticated.

First, open our login route inside app.js. Under the line:

console.dir(newUser);

Add:


And finally, inside the verify_email route under the line ‘console.log(user);’ add:


That’s it! Now if you run your app, input your email and press login, you should receive a new email with a clickable link. Clicking on it will take you to the verify_url with the user token, and authenticate it! You can find the complete working example here.

On the next blog post, we’ll add the passport module for user log in, and Orchestrate.io for our database needs. :)

Recommended For You


Most Popular


Send With Confidence

Partner with the email service trusted by developers and marketers for time-savings, scalability, and delivery expertise.