Raspberry Pi is a fun little "computer" that is an expandable hardware board with un-ending possibilities for hacking. The one downside is it can be tricky to set up Raspberry Pi without a keyboard and mouse hanging around. The following tutorial makes it reasonably easy to set up your Raspberry Pi without a keyboard and mouse. All you need is a
Raspberry Pi with a Wifi Adapter and a router with an available ethernet port.
From there, it's a 2-step process:
- Install Unix on the SD Card
- Configure the Raspberry Pi's Wifi
Let's take those one at a time.
Your Raspberry Pi comes with an SD card. We'll install Raspbian, a special Raspberry Pi flavor of Debian, on that card. I use a Mac, so that's what these instructions cover.
- Insert your SD Card into your Mac.

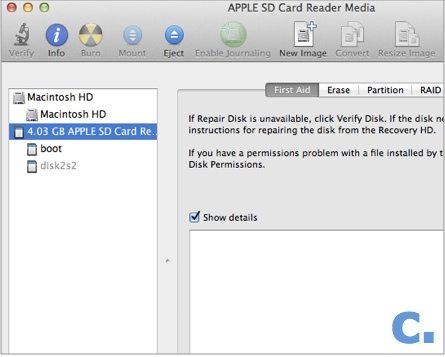
- Open up Disk Utility on your Mac.

- Select the SD Card in the list at left.
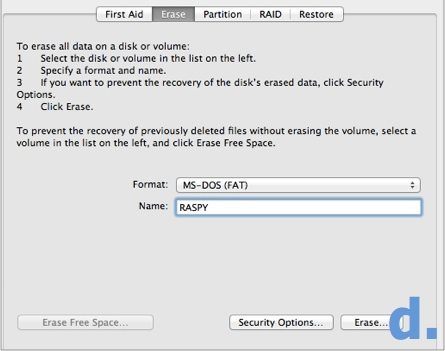
- Make sure the format is MS-DOS, give it a name, and then click Erase. Confirm that you want to Erase.
Now open up terminal and run the following commands to install
Raspbian, a Debian-based OS designed for use on the Raspberry Pi.
wget http://downloads.raspberrypi.org/raspbian_latest
tar -xzvf raspbian_latest # hit enter after this twice
diskutil list
diskutil unmountdisk /dev/disk2 # this needs to be the correct disk to your SD Card
sudo dd if=2014-01-07-wheezy-raspbian.img of=/dev/disk2 bs=2m # this needs to be the correct disk to your SD Card that you just unmounted
This can take up to 30 minutes. The dd command does not have a verbose mode to show you progress. Be patient. Go for a walk and a coffee. On completion, you will get a confirmation.
With Raspbian installed, you're ready to configure WiFi on your Raspberry Pi. To do this, we'll first need to connect it to your network over ethernet.
-
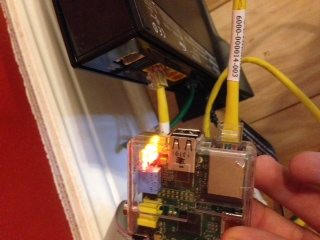
- Insert the SD Card (with Raspbian now on it) into your Raspberry Pi
- Plug your Raspberry Pi into your router with an ethernet cable.
- Find the Ip address of the Pi--I use nmap for network discovery. You can also look at your router's device table.
nmap -sn 192.168.1.1/24
Note the IP Address of the Raspberry Pi. We will use this with a default Ansible script to setup Wifi.
(If you aren't familiar with Ansible,
Yamil wrote a post on
Using Ansible with Digital Ocean. The gist of what you need is:)
- Install Ansible using Python's package manager, pip:
sudo pip install ansible
- Clone my Github repo containing example Ansible settings for Raspberry Pi:
git clone https://github.com/scottmotte/ansible-pi.git
cd ansible-pi
cp hosts.example hosts
cp wpa_supplicant.conf.example wpa_supplicant.conf
- Edit the wpa_supplicant.conf and hosts files with proper credentials.
- Finally, push your changes up to your Raspberry Pi using ansible:
ansible-playbook playbook.yml -i hosts --ask-pass --sudo -c paramiko
(The default password is
'raspberry')
That's it. Now you can unplug the ethernet cord and the Raspberry Pi will work over Wifi. Give it some time to make the connection. SSH in and build out your Pi as you wish.
There you have it: a quick tutorial on how to set up your Raspberry Pi without a keyboard and mouse. Enough reading—go and start building!
